Captain Obvious' HELLA DE INSTALL
For VW MkIVs
1 First you are going to need to take the front bumper off, this is very easy and makes installation a whole lot easier.
I used this site which is very well laid out and very useful (works for golf's/gti's or jetta's).
The only addition to it that I have is clarifying how to release the pin holding the hood release to the mechanism, this step easily took me the longest to do, it is kind of tough.
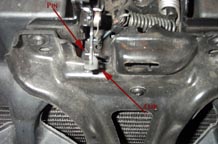
Once you look at the mechanism you can see how it works, you need to flip up the little piece of metal that keeps the two sides of the plastic pull handle from spreading apart, once that happens you need to spread these two sides far enough apart
to slip the handle off of the pin, its best accomplished with a large screwdriver by twisting the screwdriver to spread the sides apart.
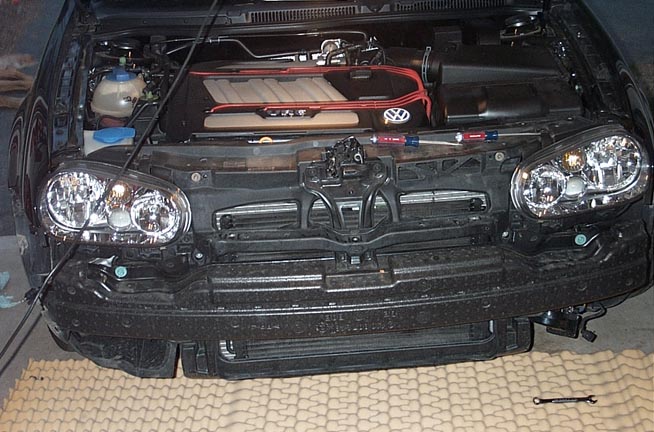
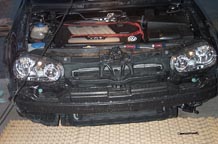
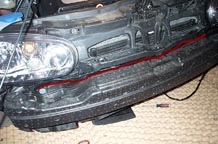
2 This is what the beast should look like now!!!!!
3 The drivers side requires a hammer, the passenger side requires scissors, I started on the driver side, remember though this is my
experience, you may or may not need to do this.
Hella's instructions state that you can have one or two horns, I think all North American cars have two, mine did, if you have one it is probably easiest
to move it to the bottom mount and just bend it. All you need to do for the bottom horn is bend the bracket down with your hand about 3/4 inch, don't
be shy.

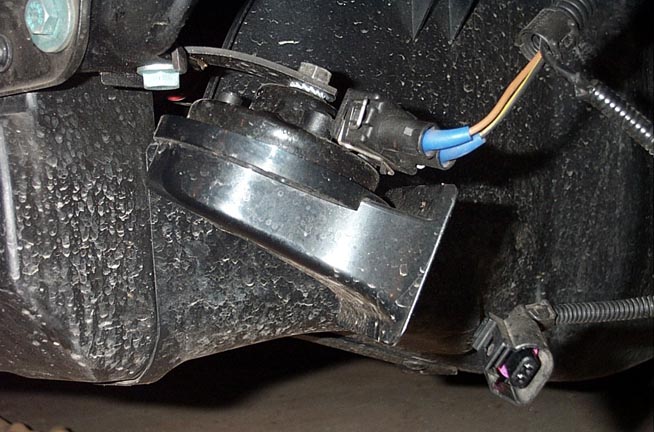
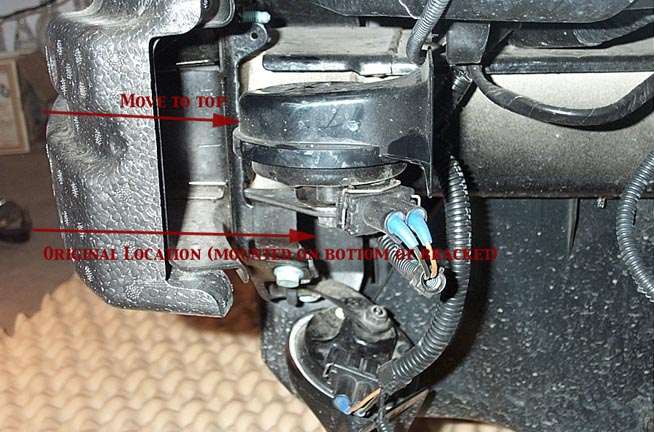
For the top horn you need to flip over the actual horn and move it so it is mounted on the top of the mounting arm.

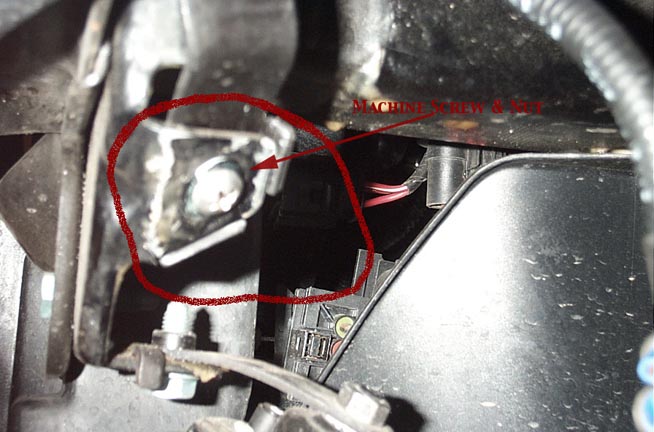
At this point I still needed clearence, I determined that the bolt and mounting ear for the upper horn mount arm was in the way
. The only was around it was to bend this tab, which is pretty thick metal. I took off the mounting arm and just hit it with a hammer to bend it in
towards the engine. In addition the bolt head interfeared with the light housings so I replaced the bolt with a pan head machine screw and nylon insert
self-locking nut. This finally gave me the clearence I needed.
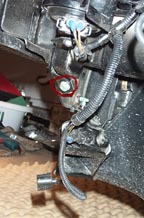
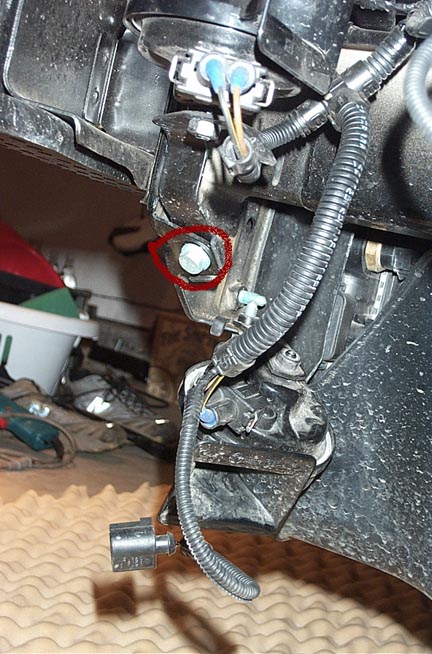
Here you can see the paint flaking from the tab being bent and vaguely how the machine screw head is much shallower than the original bolt.
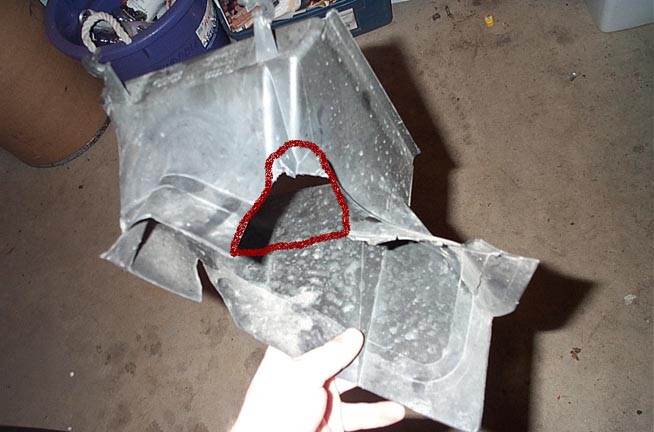
4 The passenger side has a plastic duct for the auxilary radiator behind the grille. 2.0 Owners will not have to do this!
This duct needs to be cut in order to accomodate the housing.
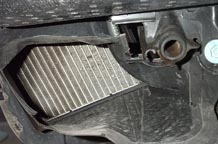
This picture shows where to cut (I haven't cut
quite enough yet)
5 Now test fit the bumper by putting the bumper on and putting in the center screw, test fit the grilles with the housings. If they dont fit
make adjustments, it may require some ingenuity. I had
to do this 5 or 6 times before I got it right! (of course no one wrote this for me!)
6 Now for the wiring, on a glx it is pretty easy, I decided to wire the hella's to be switched on by the activation of the standard fogs (in the cluster)
for glx's this procedure is the same whether you have the euroswitch or the oem na switch.
First take the drivers side headlight off using the instructions provided in the bumper removal site. With the headlight out of the way
locate the foglight wire (it was grey w/ yellow stripe on my car).
Now for a little wiring talk. The hella wiring loom comes with a relay, a switch, two looms that go to the lights, a loom that goes to the switch,
a loom that goeas to the parking lights and a loom that goes to the battery. This is how the standard hella way would work:
Your parking lights (when on) would provide power for the switch through the grey wire. The switch (when on) would then transmit the power to the relay
through the yellow wire. The relay then turns itself "on" using this signal and closes the contacts between the positve battery loom and the lights, turning them on.
All we need is a trigger for the relay, so in essence we can get rid of all the wiring for the switch, including the entire grey wire. All you need
to do is connect the yellow trigger wire directly to the factory foglight wire mentioned above. This setup eliminates the need to run a wire through the
firewall. It you dont have a glx, or want to wire the lights seperately from the factory lights there are two ways to go.
If you are using a euro or glx switch just run the yellow wire to foglight pin on the back of the switch (bypass the whole parking light thing). If
you are going to use the hella switch (or another) just use the hella instructions.
Relay wiring is as follows (Relay pins have a standard (DIN) numbering system).
Pin 86 - Trip. This is your trigger wire, it can be wired to an existing foglight, a postion on a euro switch, a switch you supply, the passenger side seat heater, a dome light... Your foglights will turn on whenever this cicuit has voltage present (whenever thw switch, light, seat heater, is on).
Pin 85 - Ground. Wire this to a common grounding point on the chassis, the negative terminal of the battery, etc.
Pin 87 - Output. Wire this to whatever you want to turn on when your trigger circuit is energized. In this case, it is your foglights, so wire both of the positive leads to this pin.
Pin 30 - Input. Wire this to your source. In this case, it needs to go directly to your battery (positive). Fuse this line if there is not already a fuse somewhere in your cicuit or if you are not using a fused relay (you will know if you are using one, it will have a fuse attached to it). The relay lets the power flow directly from the source to the output instead of flowing through the actual switch. A relay essentially acts as a switch with a remote trigger.
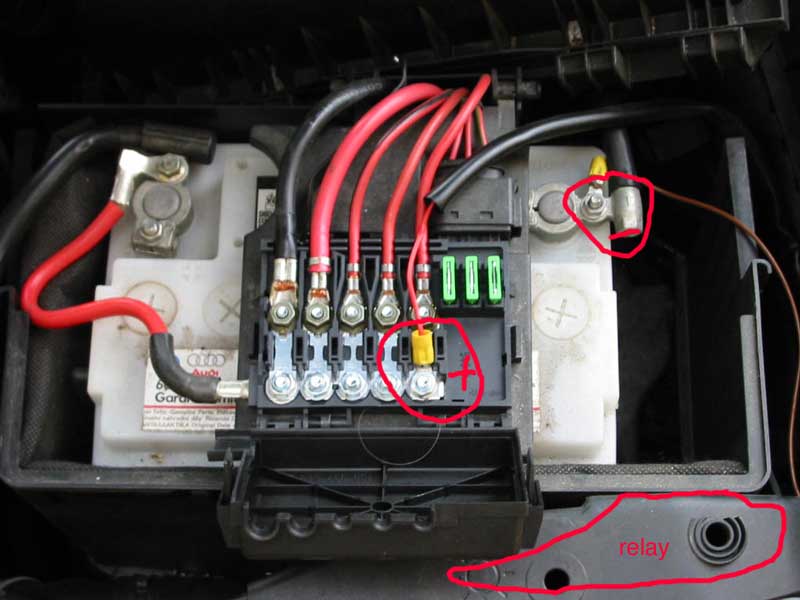
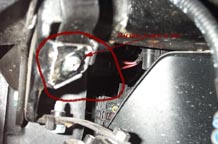
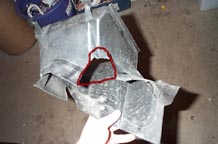
7 - Update People were having questions about postive and negative wiring so here is how I did it. Just make sure that
the positive connection is BEFORE the fuse (ie toward the front of the car). I just tucked the relay into the light bulb access panel (the circled
panel.)

8 For wire routing I just tucked the passenger side wire loom up against the back of the styrofoam impact bumper, you will see how there is plenty
of room.
Want to use your foglights with a European Bumper?? This is not a problem at all. As many VW products, the Hella kit was actually designed for the European front bumper, and as such the lights actually fit better in a Euro front. If I ever get some motivation (not exactly likely), I will post a picture of the DEs with my Euro bumper. (Don't hold your breath, it took me two years just to post this paragraph)
Thats pretty much it.
See the Finished Product
Problems with Blown Fuses?
.